Google 云平台上搭建 MEAN stack
By: Sandeep Dinesh - 2015年7月29日
在 最近的文章中,我讲过如何通过 Docker 容器来运行 MEAN stack
可以很好的很轻松的手动部署容器,但是也是比较笨的非常容易出错方法。程序崩溃会怎样?如何更新应用?回滚?
令人欣慰的是,现在有一个叫 Kubernetes 的系统,可以让我们来管理我们的容器。更好的消息是,Google 有一个 Kubernetes 的版本管理 叫做Google Container Engine 让你可以在几分钟内搭建起来MEAN stack
- Kubernetes 基础知识
- 第一步:创建容器
- 第二步:构建容器
- 第三步:上传容器
- 第四步: 创建群集
- 第五步:创建数据库服务
- Step 6: Running the Database
- Step 7: Creating the Web Server
- Step 8: Running the Web Server
- Step 9: Accessing the App
Kubernetes 基础知识
在我们开始 kube 之前,了解一些 Kubernetes 的基础知识是非常重要的。
- 容器:这些都是 Docker,rtk,AppC,或者任何可以运行的容器。你可以把它们想象为原子粒子;所有大小都由他们组成,但是你几乎不会(也许曾经)直接和他们交互。
- Pods:Pods 是 Kubernetes 的基本组成部分。它封装了一组容器,一起存活。那么为什么你需要一个容器组而不是一个单独的容器呢?比如说,你有一个日志处理器,web 服务器和数据库。如果你不适用 Pods,那就必须让web服务器,数据库,以及日志处理器能够互相访问,并且没更新其中一个,另外的两个也必须要更新。适用 Pods 你可以适用同一个web 服务器,数据库以及日志处理器。
- Replication Controllers:这是 Kubernetes 的管理组件,它非常好用。你设置一组 Pods 告诉他我想要“三个和它一样的副本”,然后它会群集上创建这些副本,它会确保这些副本正常运行。如果崩溃了,它会重建一个新的。
- Services:这个是Replication Controllers的另一半。
Services是一组 Pods 的单独连接点。例如,如果你有4组Replication Controllers控制的副本,Services会“永久”的让这些 Pods 进进出出,所以用Services是一个号办法。
第一步:创建容器
在我以前的帖子里,为了方便,我都使用现成的容器。
我有一个现成的 MongoDB 容器和 Node.js 容器。Mongo容器不用做任何修改就可以很好的运行。但是,我不得不手动创建 Node 容器。显然,在 Kubernetes 的领土上,这不是理想做法。因为你不应该到服务器去操作!
相反,你应该创建一个已经有源代码的容器,并让它自动运行。
要做到这点,你要更多的使用 Docker。确保在一下教程中你用的是最新版本。
获取代码:
在开始之前,让我们运行一些代码。你可以在你的电脑上,或者 云端的 Linux 虚拟机上跟我操作。我建议使用 Linux 或者 Linux 虚拟机;本教程不深究如何 Mac 和 Windows 上运行。
$ git clone https://github.com/ijason/NodeJS-Sample-App.git app
$ mv app/EmployeeDB/* app/
$ sed -i -- 's/localhost/mongo/g' ./app/app.js
这时我们以前运行过的例子。第二行只是移动EmployeeDB文件夹到app文件夹,以便容易操作,第三行,使用mongo代理来替换localhost的硬编码.
构建 Docker 镜像:
首先,你需要一个Dockerfile。它是创建 Docker 镜像的基本指令文件。
这个是 web 服务器的Dockerfile;
FROM node:4.4

RUN mkdir -p /usr/src/app
WORKDIR /usr/src/app
COPY ./app/ ./
RUN npm install

CMD ["node", "app.js"]
Dockerfile是非常容易理解的,而这一个简单的要死。
首先,它使用 Node。js 的 LTS 正式镜像作为基础镜像。
然后,创建一个保存代码的文件夹,cd切换到那个文件夹,复制代码文件进去,并用 npm 安装相关依赖。
最后,这个特别的命令,是 Docker 容器运行时调用它去启动 app 的。
第二步:构建容器
现在,这个文件夹应该是这样的:
$ ls

Dockerfile app
让我们创建它吧。
$ docker build -t myapp .
它会为你的应用创建一个新的 Docker 容器。它会花上一段时间,自动下载一切需要的,并构建它。
等它完成后,让我们来测试它:
$ docker run myapp
这时候,你应该有一个服务运行在http://localhost:3000(或者 Docker 告诉你的地址)。因为还没运行数据库,这个网站会报错。但是,可以自动它是可以运行的。

第三步:上传容器
现在你有一个自定义的 Docker 镜像,现在要在云端也可以访问它。
正如我们将要用Google Container Engine使用这个镜像一样,最好吧镜像上传到Google Container Registry。这个容器仓库是建立在Google Cloud Storage上面的,所以你可以扩展储存空间并且可以快速的访这个容器引擎。
首先,你需要安装Google Cloud SDK installed的最新版本。
Linux/Mac:
$ curl https://sdk.cloud.google.com | bash
然后,你需要登录并更新组件。
$ gcloud auth login
$ gcloud components update
你已经准备好上传容器了,但是你需要自动保存到哪里。在Google 云平台控制中心创建一个空的项目,使用下面的项目 ID 来上传你的项目。
$ docker tag myapp gcr.io/<YOUR-PROJECT-ID>/myapp
$ gcloud docker push gcr.io/<YOUR-PROJECT-ID>/myapp
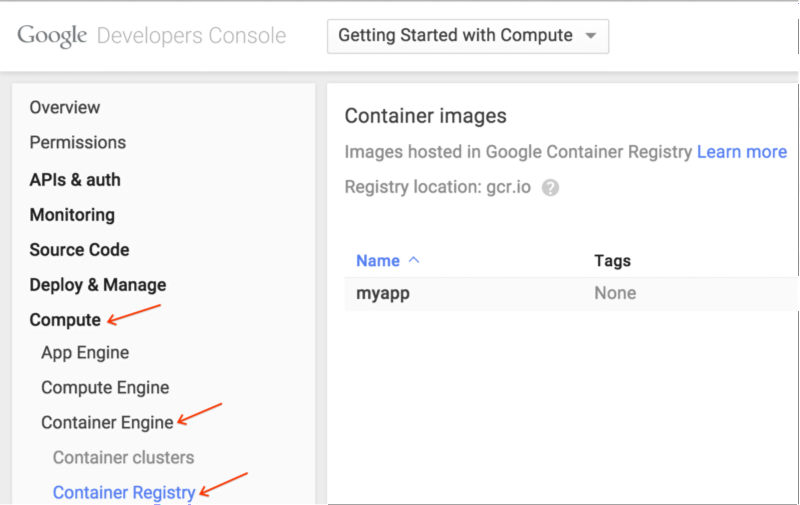
稍等一会,它就会完成。你可以在控制中心看到这个容器已经上传了。
第四步: 创建群集
现在,有了这个自定义容器。让我们创建一个群集来运行它。
目前,一个群集可以是一台或者100台机器,你可以选择任何机器,这样你就可以有一个f1-micro群集,100个n1-standard-32实例(3,200 核!),或者它们之间的任意大小的群集。
在本教程中我们做以下操作;
- 创建一个叫
mean-cluster群集 - 给群集两个 node
- 机器类型用
n1-standard-1 - 区域选择
us-central-1f(用一个离你近的)
有两个办法来创建全集,任由你选择。
命令行:
$ gcloud beta container \
 --project "<YOUR-PROJECT-ID>" \
 clusters create "mean-cluster" \
 --zone "us-central1-f" \
 --machine-type "n1-standard-1" \
 --num-nodes "2" \
 --network "default"
GUI:

几分钟后,你就可以在控制中心看到这个。

第五步:创建数据库服务
需要做三件事:
- 持久储存数据(pod 是临时的,所以我们不应该在本地保存)
- 用Replication Controller运行 MongoDB
- 映射服务到Replication Controller
运行这个来创建磁盘:
$ gcloud compute disks create \
 --project "<YOUR-PROJECT-ID>" \
 --zone "us-central1-f" \
 --size 200GB \
 mongo-disk
给你的应用选择同一区域的群集和一个大小合适的硬盘。
现在,我们需要创建一个运行数据库的 Replication Controller。我用的是 Replication Controller 而不是 pod,因为如果一个独立的 pod 死掉了,他不会自动重启。
db-deployment.yml
apiVersion: extensions/v1beta1
kind: Deployment
metadata:
  name: mongo-deployment
spec:
  replicas: 1
  template:
    metadata:
      labels:
        name: mongo
    spec:
      containers:
      - image: mongo
        name: mongo
        ports:
        - name: mongo
          containerPort: 27017
          hostPort: 27017
        volumeMounts:
          - name: mongo-persistent-storage
            mountPath: /data/db
      volumes:
        - name: mongo-persistent-storage
          gcePersistentDisk:
            pdName: mongo-disk
            fsType: ext4
我们叫这个控制器为mongo-controller,指定一个副本,并打开相应端口。mongo镜像是一个已存的 MongoDB 镜像
The volumes section creates the volume for Kubernetes to use. There is a Google Container Engine-specific gcePersistentDisk section that maps the disk we made into a Kubernetes volume, and we mount the volume into the /data/db directory (as described in the MongoDB Docker documentation)
Now we have the Deployment, let’s create the Service:
db-service.yml
apiVersion: v1
kind: Service
metadata:
 labels:
   name: mongo
 name: mongo
spec:
 ports:
   - port: 27017
     targetPort: 27017
 selector:
   name: mongo
Again, pretty simple stuff. We “select” the mongo Deployment to be served, open up the ports, and call the service mongo.
This is just like the “link” command line option we used with Docker in my previous post. Instead of connecting to localhost, we connect to mongo, and Kubernetes redirects traffic to the mongo service!
At this point, the local directory looks like this:
$ ls

Dockerfile
app
db-deployment.yml
db-service.yml
Step 6: Running the Database
First, let’s “log in” to the cluster
$ gcloud container clusters get-credentials mean-cluster
Now create the Deployment.
$ kubectl create -f db-deployment.yml
And the Service.
$ kubectl create -f db-service.yml
kubectl is the Kubernetes command line tool (automatically installed with the Google Cloud SDK). We are just creating the resources specified in the files.
At this point, the database is spinning up! You can check progress with the following command:
$ kubectl get pods
Once you see the mongo pod in running status, we are good to go!
$ kubectl get pods

NAME                    READY  REASON   RESTARTS AGE
mongo-deployment-xxxx   1/1    Running  0        3m
Step 7: Creating the Web Server
Now the database is running, let’s start the web server.
We need two things:
- Deployment to spin up and down web server pods
- Service to expose our website to the interwebs
Let’s look at the Deployment configuration:
web-deployment.yml
apiVersion: extensions/v1beta1
kind: Deployment
metadata:
  name: web-deployment
spec:
  replicas: 2
  template:
    metadata:
      labels:
        name: web
    spec:
      containers:
      - image: gcr.io/<YOUR-PROJECT-ID>/myapp
        name: web
        ports:
        - name: http-server
          containerPort: 3000
Here, we create a deployment called web-deployment, and we tell it to create two replicas. Replicas of what you ask? You may notice the template section looks just like a Pod configuration, and that’s because it is. We are creating a Pod with our custom Node.js container and exposing port 3000.
Now for the Service
web-service.yml
apiVersion: v1
kind: Service
metadata:
 name: web
 labels:
   name: web
spec:
 type: LoadBalancer
 ports:
   - port: 80
     targetPort: 3000
     protocol: TCP
 selector:
   name: web
Notice two things here:
- The type is LoadBalancer. This is a cool feature that will make Google Cloud Platform create an external network load balancer automatically for this service!
- We map external port 80 to the internal port 3000, so we can serve HTTP traffic without messing with Firewalls.
At this point, the local directory looks like this
$ ls

Dockerfile
app
db-deployment.yml
db-service.yml
web-service.yml
web-deployment.yml
Step 8: Running the Web Server
Create the Deployment.
$ kubectl create -f web-deployment.yml
And the Service.
$ kubectl create -f web-service.yml
And check the status.
$ kubectl get pods
Once you see the web pods in running status, we are good to go!
$ kubectl get pods

NAME                   READY     REASON    RESTARTS   AGE
mongo-deployment-xxxx  1/1       Running   0          4m
web-deployment-xxxx    1/1       Running   0          1m
web-deployment-xxxx    1/1       Running   0          1m
Step 9: Accessing the App
At this point, everything is up and running. The architecture looks something like this:

By default, port 80 should be open on the load balancer. In order to find the IP address of our app, run this command:
$ gcloud compute forwarding-rules list

NAME     REGION        IP_ADDRESS       IP_PROTOCOL TARGET
abcdef   us-central1   104.197.XXX.XXX  TCP         us-xxxx
If you go to the IP address listed, you should see the app up and running!
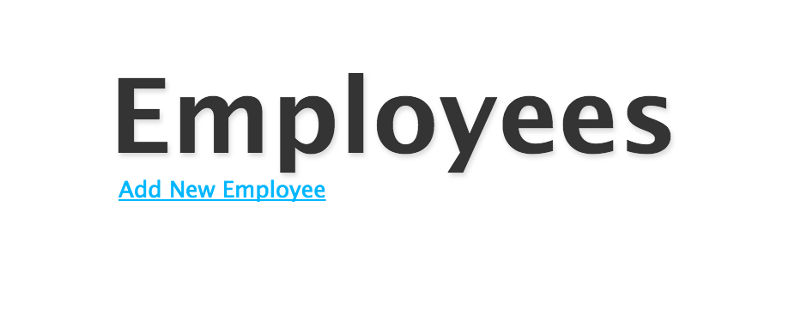
And the Database works!

Final Thoughts
By using Container Engine and Kubernetes, we have a very robust, container based MEAN stack running in production.
In another post, I cover how to setup a MongoDB replica set. This is very important for running in production.
Hopefully I can do some more posts about advanced Kubernetes topics such as changing the cluster size and number of Node.js web server replicas, using different environments (dev, staging, prod) on the same cluster, and doing rolling updates.
Thanks to Mark Mandel, Aja Hammerly, and Jack Wilber. Some rights reserved by the author.